Sunday, February 2, 2025
Modern Woodworking Projects: Sleek and Trendy Creations
Modern Woodworking Projects: Sleek and Trendy Creations
The resurgence of woodworking isn't just a hobby; it's a movement. People are craving handcrafted items with unique character, a stark contrast to mass-produced goods. Modern woodworking embraces clean lines, minimalist aesthetics, and innovative techniques to create pieces that are both functional and stunning. This article explores several sleek and trendy projects perfect for both seasoned craftsmen and enthusiastic beginners. We'll delve into design inspiration, materials, and techniques to help you build your next masterpiece.

Floating Shelves: A Minimalist Marvel
Floating shelves offer a fantastic blend of practicality and modern design. They effortlessly declutter spaces while adding a touch of visual interest. Avoid bulky brackets; the secret to a truly modern look lies in clever, hidden mounting systems. Use robust dowels or concealed metal brackets to seamlessly integrate the shelves into the wall. Consider using contrasting wood tones to create visual depth, such as pairing a dark walnut shelf against a lighter-colored wall. Experiment with different shelf depths and lengths to tailor the design to your space. A staggered arrangement adds dynamism, while uniform shelves create a sense of calm order.

Materials and Tools You'll Need:
- Hardwood of your choice (e.g., walnut, maple, oak)
- Concealed shelf brackets or sturdy dowels
- Wood glue
- Wood screws
- Drill and drill bits
- Level
- Measuring tape
- Sander and sandpaper
- Wood finish (e.g., oil, varnish)
Geometric Coffee Table: A Statement Piece
A geometric coffee table instantly elevates any living room. This project allows for considerable creative freedom. Experiment with diverse shapes like hexagons, trapezoids, or even more intricate polygons. Consider combining different wood types for a striking multi-toned effect. For example, use contrasting species for the tabletop and legs, or incorporate inlaid wood strips to create patterns. Remember to emphasize clean joints and precise cuts for a truly polished look. The use of epoxy resin inlays between the wood sections can add a modern, almost artistic touch. Adding a simple, yet elegant, live edge to the table top can add a more natural and rustic feel, contrasting well with the geometric structure.
Key Considerations:
- Precise measurements and cuts are crucial for a successful outcome.
- Utilize joinery techniques like miter joints or dados for strong and visually appealing connections.
- Sanding is key to achieving a smooth, flawless finish.
- Choose a durable finish that will withstand daily wear and tear.
Mid-Century Modern Nightstands: A Timeless Classic
Mid-century modern design continues to inspire. These nightstands often feature tapered legs, simple lines, and a focus on functionality. Select a hardwood like walnut or cherry for a rich, warm aesthetic. Focus on clean, simple lines, avoiding excessive ornamentation. Consider adding subtle details like brass hardware or a unique wood grain pattern to personalize the design. Tapered legs can be easily achieved using a table saw and some careful planning, adding an elegant touch to the piece. Finishing the nightstands with a satin or semi-gloss finish will enhance the wood's natural beauty without being overly shiny.
Modern woodworking isn't just about creating beautiful objects; it's about expressing creativity and connecting with the materials. By embracing clean lines, innovative techniques, and a focus on quality, you can craft pieces that are both stylish and enduring. So, gather your tools, choose your wood, and start building!
Rustic Country Woodworking Plans for Cozy Home Decor
Rustic Country Woodworking Plans for Cozy Home Decor
Transform your house into a home brimming with rustic charm using these detailed woodworking plans. We'll guide you through creating beautiful, functional pieces that perfectly capture the cozy essence of country living. Forget mass-produced furniture; these plans empower you to craft unique, heirloom-quality items that reflect your personal style and add undeniable warmth to your space. Get ready to roll up your sleeves and discover the joy of creating something truly special.

Rustic Floating Shelves: A Simple Yet Stunning Project
Floating shelves offer a versatile and visually appealing way to showcase cherished items and add personality to any room. These rustic shelves, crafted from reclaimed wood or freshly-milled pine, exude a sense of warmth and character. The beauty lies in their simplicity; the focus remains on the natural beauty of the wood grain and the subtle imperfections that tell a story. Start by selecting your lumber – consider weathered barn wood for an authentic vintage look, or opt for freshly-milled pine for a lighter, cleaner aesthetic. Precise measurements are key to achieving a clean, flush mount. Once cut to size, sand the edges smooth and apply a clear sealant to protect the wood and enhance its natural tones. Simple, yet incredibly impactful, these shelves are perfect for displaying books, plants, or decorative items.

Materials Needed:
- Reclaimed wood or pine boards (length and width depending on desired shelf size)
- Wood screws (matching wood tone)
- Wood glue
- Sandpaper (various grits)
- Clear wood sealant
- Level
- Drill
- Measuring tape
Step-by-Step Instructions (Simplified):
- Measure and cut the wood to your desired dimensions.
- Sand the edges and surfaces smooth.
- Apply wood glue to the back of the shelf and attach hidden brackets to the wall.
- Secure the shelf to the brackets using wood screws.
- Apply clear sealant for protection and enhanced finish.
A Charming Farmhouse Coffee Table: Adding Rustic Elegance to Your Living Room
This project elevates the humble coffee table to a statement piece. Imagine a sturdy, handcrafted table built from thick, reclaimed wood planks, its rich patina telling tales of time and craftsmanship. The slightly uneven surface and visible wood knots add to its unique charm. This table isn't just a functional piece; it's a conversation starter, a testament to your dedication to creating something beautiful and enduring. We'll use robust wood like oak or hickory for lasting durability. Consider adding industrial-style metal legs for a striking contrast in textures and a modern touch that complements the rustic aesthetic. The finished product will undoubtedly become a focal point in your living room, radiating warmth and inviting guests to linger.
Rustic Wooden Candle Holders: Simple Crafts for Instant Ambiance
These rustic candle holders are an effortlessly charming addition to any room. Whether you use reclaimed wood scraps or newly purchased lumber, the process is straightforward. Simple cuts and some sanding create charming, personalized holders. Vary the size and shape for an eclectic collection. Adding a rustic finish – whether it's a weathered gray wash or a natural oil – ties the design together. These little candle holders add a warm, inviting glow, perfect for creating a cozy atmosphere in any space. They also make excellent gifts, showcasing your woodworking skills and offering a personalized touch.
Embracing Imperfection: The Beauty of Rustic Charm
The key to successful rustic woodworking lies in embracing imperfection. Don't strive for flawless surfaces; the character of the wood, its knots, and its natural variations are what truly define the rustic style. Those seemingly minor imperfections are what give your creations unique character and tell a story. Let the natural beauty of the wood shine through. A simple, clear sealant will protect the wood without masking its unique qualities. These projects are less about precision and more about capturing the heart of rustic charm.
Baby Furniture Plans for Functional and Chic Baby Cribs and Chairs
Baby Furniture Plans for Functional and Chic Baby Cribs and Chairs

Designing the Ideal Baby Crib: A Blend of Safety and Style
The crib serves as the cornerstone of a nursery, providing a safe and comfortable haven for a newborn. Careful planning and execution are paramount, ensuring both the aesthetic appeal and the structural integrity of the piece. This section details crucial considerations for designing a functional and chic baby crib.

Material Selection: Durability and Aesthetics
The choice of materials significantly impacts the crib's longevity and overall appearance. Hardwoods such as maple, cherry, and oak offer superior durability and a classic aesthetic. They are resistant to wear and tear, making them ideal for withstanding the rigors of daily use. However, these materials typically command a higher price point. Softwoods like pine are more budget-friendly but may require more frequent maintenance and are less resistant to scratches. Consider the trade-offs between cost and durability when making your selection. Finally, MDF (medium-density fiberboard) and plywood present viable alternatives, offering affordability and design flexibility, but their durability may be inferior to hardwood options. Ensure the chosen material meets all safety standards for baby furniture, free from harmful chemicals and toxins.
Structural Design: Safety First
Safety should always be the primary consideration when designing a crib. Compliance with relevant safety standards, such as those set by the ASTM International (American Society for Testing and Materials) and CPSC (Consumer Product Safety Commission) is non-negotiable. This includes adherence to regulations regarding slat spacing (to prevent entrapment), mattress support firmness, and the overall stability of the crib structure. Detailed plans should incorporate robust joinery techniques, such as mortise and tenon joints or strong dowel connections, to ensure stability and prevent accidental collapse. Consider using reinforced corners and edges to further enhance durability and safety.
Aesthetics and Customization: Infusing Personal Style
While safety is paramount, the aesthetic appeal of the crib is equally important. The design should complement the overall nursery theme and reflect the parents' personal style. Customization options can include:
- Unique finishes: Explore various staining and painting techniques to achieve the desired look, from natural wood finishes to vibrant colors.
- Customizable headboard and footboard: Incorporate intricate carvings, decorative moldings, or even personalized engravings to add a touch of uniqueness.
- Adjustable mattress height: This feature allows parents to adjust the mattress height as the child grows, ensuring ease of access and safety.
- Storage solutions: Incorporate drawers or shelves to maximize storage space within the crib, keeping the nursery organized.
Designing the Perfect Baby High Chair: Ergonomics and Elegance
The high chair is another essential piece of baby furniture, offering a dedicated and safe space for mealtimes. Careful consideration of ergonomics and aesthetics is crucial in designing a high chair that is both functional and stylish.
Ergonomic Considerations: Comfort and Safety
A well-designed high chair prioritizes the comfort and safety of the baby. The seat should be ergonomically shaped to support the child's posture and prevent slouching. Proper back support is crucial, ensuring the baby's spine is correctly aligned. The seat height should be adjustable to accommodate the growing child, ensuring a comfortable and secure seating position. Furthermore, the footrest should be appropriately positioned to allow for proper foot placement and maintain good posture. Consider incorporating safety features such as a five-point harness and a stable base to prevent tipping or accidental falls.
Materials and Construction: Strength and Style
Similar to the crib, the selection of materials significantly impacts the high chair's durability and aesthetics. Hardwoods are preferred for their strength and longevity, although durable plastics offer a lighter and easier-to-clean alternative. The construction should be robust, ensuring the stability and safety of the chair. Strong joints and reinforced connections are essential to prevent collapse or breakage. The surface should be smooth and easy to clean, preventing the accumulation of food particles and bacteria.
Aesthetic Design: Blending Form and Function
The high chair's design should blend seamlessly with the nursery's overall aesthetic. Consider incorporating design elements that complement the crib and other nursery furniture. Customization options include:
- Unique finishes: Experiment with various paint colors, stains, or even fabric upholstery to personalize the high chair.
- Shaped seat and back: Create ergonomic designs that offer enhanced support and comfort.
- Integrated tray: Include a removable and easily washable tray for mealtimes.
- Foldable design: A foldable design can help save space when not in use.
Advanced Design Considerations: Sustainability and Customization
Beyond the basic functional and aesthetic requirements, incorporating sustainable practices and advanced customization options elevates the design process to a higher level.
Sustainable Materials: Minimizing Environmental Impact
Employing sustainably sourced wood, recycled materials, or non-toxic finishes minimizes the environmental impact of the furniture. Certifications such as FSC (Forest Stewardship Council) for wood sourcing can help ensure responsible forestry practices. The use of low-VOC (volatile organic compound) paints and finishes reduces harmful emissions and promotes a healthier indoor environment for the baby.
Advanced Customization: Personalization and Functionality
Advanced customization can extend beyond basic aesthetics. This includes integrating smart features, such as sensors to monitor the baby's comfort or lighting systems to create a calming atmosphere. The design can also be adapted to accommodate specific needs, such as creating a high chair that is suitable for children with disabilities. Furthermore, modular designs that allow for future adaptation and repurposing of the furniture add significant long-term value.
Conclusion: Creating Enduring Heirlooms
Designing baby furniture requires a delicate balance between functionality, safety, and style. By meticulously planning and executing the design process, paying close attention to materials, construction, and safety standards, parents can create beautiful and enduring pieces that will serve their children for years to come. These pieces can transition from fulfilling their primary function to becoming cherished heirlooms, embodying the love and care invested in their creation.
Cedar Woodworking Plans for Durable and Beautiful Outdoor Furniture
Cedar Woodworking Plans for Durable and Beautiful Outdoor Furniture
Imagine relaxing on a handcrafted cedar bench, the warm, fragrant wood gently warming you as the sun sets. Or picture a sturdy cedar picnic table, hosting laughter and memories for years to come. This isn't a dream; it's a reality within reach with the right plans and a little elbow grease. Cedar, with its natural resistance to rot and insects, makes the perfect material for outdoor furniture that will endure the elements and enhance your outdoor space. This article provides you with detailed insights and inspiration for building your own stunning and long-lasting cedar creations.

Choosing the Right Cedar
Not all cedar is created equal. When selecting cedar for your project, prioritize quality and appropriate grading. Western Red Cedar and Eastern White Cedar are popular choices, both offering excellent natural resistance to decay and insect infestation. Look for lumber that is graded appropriately for outdoor use, minimizing knots and checking for consistent thickness and straight grain. Avoid lumber with significant cracks or warping, as these can compromise the structural integrity of your finished piece. Consider the specific characteristics of each type: Western Red Cedar boasts a rich reddish hue, while Eastern White Cedar presents a lighter, more pale tone. The final choice often comes down to personal aesthetic preference and availability.

Assessing Lumber Quality:
Before you begin your project, carefully inspect each piece of cedar lumber. Look for:
- Consistent thickness and width throughout the board.
- Minimal knots, preferably small and tightly bound.
- Straight grain, free from significant warping or bowing.
- No signs of significant cracks or decay.
Essential Cedar Woodworking Plans
The internet offers a wealth of free and paid cedar woodworking plans, catering to all skill levels. Begin by identifying the piece of furniture you wish to build. Do you dream of a comfortable Adirondack chair? A spacious picnic table? A stylish cedar planter box? Once you've chosen your project, locate detailed plans that include accurate measurements, cut lists, and assembly instructions. Many reputable websites and woodworking magazines offer high-quality plans, often accompanied by helpful diagrams and photographs. Don't hesitate to invest in a comprehensive plan; a well-structured guide will significantly enhance the quality and efficiency of your build.
Finding Reliable Plans:
Research and choose plans from trusted sources. Consider factors such as:
- Detailed diagrams and illustrations.
- Clear and concise instructions.
- Comprehensive cut lists with precise measurements.
- Positive user reviews and testimonials.
Building Your Cedar Masterpiece
With your chosen plans and high-quality cedar in hand, you're ready to begin construction. Start by carefully cutting your lumber according to the plan's specifications. Using sharp, well-maintained tools is crucial for clean cuts and precise joinery. Follow the instructions meticulously, paying close attention to joinery techniques such as mortise and tenon, dadoes, or simple butt joints. As you assemble your piece, remember to use appropriate fasteners and joinery techniques to ensure strength and durability. A little extra care during assembly translates directly into a longer-lasting and more beautiful finished product.
Finishing Touches:
Once assembled, carefully sand your cedar furniture to achieve a smooth finish. Consider applying a high-quality, exterior-grade sealant or stain to protect the wood from the elements and enhance its natural beauty. Choose a sealant that allows the wood to breathe, preventing moisture buildup and rot. Regular maintenance, such as occasional cleaning and re-application of sealant, will extend the life of your cedar furniture, ensuring it continues to grace your outdoor space for many years to come.
Wednesday, November 20, 2024
How to Build and Sell Chess Tables with a Unique Twist on Classic Designs

Building and Selling Chess Tables with a Unique Twist on Classic Designs
The timeless game of chess has captivated minds for centuries. Its intricate strategies, elegant pieces, and the thrill of intellectual combat continue to allure players of all ages. However, the experience of playing chess is often elevated by the setting. A beautifully crafted chess table can transform a simple game into an immersive and aesthetically pleasing affair.
Recognizing this, savvy entrepreneurs are exploring opportunities to create and sell unique chess tables that cater to the discerning tastes of chess enthusiasts. This article delves into the intricacies of building and selling chess tables with a distinctive twist on classic designs, providing a comprehensive guide for aspiring entrepreneurs.
Understanding the Market Demand
Before embarking on any business venture, it is essential to understand the target market and its demands. The chess table market encompasses a diverse range of customers, from casual players seeking an elegant addition to their homes to serious collectors looking for handcrafted masterpieces.
Identifying the Target Audience
The primary target audience for unique chess tables can be categorized into the following:
- Chess enthusiasts: These individuals are passionate about the game and appreciate high-quality, functional tables.
- Home décor enthusiasts: Seeking unique and stylish furniture pieces, they are drawn to the aesthetic appeal of handcrafted chess tables.
- Collectors: This segment values rarity, craftsmanship, and historical significance, potentially investing in limited-edition or custom-made chess tables.
- Gift buyers: Looking for extraordinary gifts for special occasions, they might seek chess tables as unique and memorable presents.
Analyzing Market Trends
The market for chess tables is dynamic and influenced by several factors:
- Growing popularity of chess: The resurgence of chess, fueled by popular culture and streaming platforms, drives demand for quality chess equipment, including tables.
- Rise in artisanal craftsmanship: Consumers are increasingly valuing handmade items and appreciate the unique character of handcrafted chess tables.
- Focus on personalized experiences: Custom-designed chess tables that reflect the individual preferences and tastes of buyers are gaining traction.
Developing a Unique Selling Proposition (USP)
In a competitive market, establishing a distinct USP is crucial for standing out. Here are some potential USPs for chess tables:
Design Innovation
- Modern interpretations of classic designs: Reimagine traditional chess table styles with contemporary elements, such as sleek lines, minimalist aesthetics, and innovative materials.
- Fusion of cultures: Blend elements from different cultures or time periods to create a unique and visually captivating design.
- Thematic tables: Design chess tables around specific themes, such as historical events, fictional worlds, or natural elements.
Craftsmanship and Materials
- Use of exotic woods: Emphasize the beauty and durability of rare and sustainable hardwoods.
- Hand-carved details: Incorporate intricate carvings, inlays, and decorative elements to elevate the craftsmanship.
- Unique finishes: Experiment with different finishes, such as hand-rubbed oils, natural waxes, or specialized lacquers, to achieve distinctive textures and colors.
Functionality and Features
- Built-in storage: Include drawers or compartments for storing chess pieces, books, and other accessories.
- Integrated lighting: Add LED lights to illuminate the playing surface and enhance the ambiance.
- Adjustable height: Offer tables with adjustable height options for comfortable play.
Building a High-Quality Chess Table
Crafting a high-quality chess table demands precision, skill, and attention to detail. Here's a step-by-step guide:
Choosing Materials
- Wood selection: Consider the aesthetics, durability, and workability of different wood species. Popular choices include mahogany, walnut, cherry, maple, and oak.
- Tabletop material: Ensure the tabletop is smooth, durable, and provides a stable surface for the chessboard.
- Hardware: Select high-quality hinges, drawer slides, and other hardware components for longevity and smooth operation.
Design and Construction
- Sketching and planning: Create detailed sketches and blueprints outlining the dimensions, design elements, and construction process.
- Cutting and shaping: Precisely cut and shape the wood components using hand tools or woodworking machinery.
- Assembly: Join the various components using woodworking techniques, such as mortise and tenon joints, dovetail joints, or glue.
Finishing Touches
- Sanding and smoothing: Smooth the surface of the table using various grits of sandpaper to create a flawless finish.
- Applying finishes: Apply multiple coats of stain, varnish, or lacquer to protect the wood and enhance its natural beauty.
- Adding details: Incorporate decorative elements, such as carvings, inlays, or metal accents, to create a unique and eye-catching design.
Marketing and Selling Chess Tables
Once the chess tables are crafted, it's time to bring them to market. A successful marketing and sales strategy is essential for reaching the target audience and generating revenue.
Building an Online Presence
- Website: Create a professional website showcasing the unique designs, craftsmanship, and features of your chess tables. Include high-quality images and detailed descriptions.
- Social media: Establish a presence on relevant social media platforms, such as Instagram, Pinterest, and Facebook, to engage with potential customers and promote your products.
- Online marketplaces: List your chess tables on online marketplaces like Etsy, eBay, and Amazon, expanding your reach and connecting with a broader audience.
Offline Sales Channels
- Craft fairs and art shows: Participate in local events to showcase your work directly to potential buyers.
- Retail partnerships: Collaborate with specialty stores, gift shops, and furniture retailers to sell your chess tables through their channels.
- Custom orders: Offer custom-designed chess tables to cater to the unique preferences of individual customers.
Pricing Strategy
Determine a fair price that reflects the quality, craftsmanship, and uniqueness of your chess tables. Consider factors such as materials, labor costs, market demand, and competitive pricing.
Conclusion
Building and selling chess tables with a unique twist on classic designs can be a rewarding and profitable venture. By understanding the market, developing a strong USP, crafting high-quality tables, and implementing effective marketing strategies, aspiring entrepreneurs can establish a successful business in this niche market.
Remember, the key to success lies in creating beautiful and functional chess tables that resonate with the passions of chess enthusiasts and home décor aficionados. With dedication, creativity, and a commitment to excellence, entrepreneurs can carve out a unique space for themselves in the world of handcrafted chess tables.
Tuesday, November 19, 2024
DIY Blanket Ladders That Are Perfect for Small Apartments
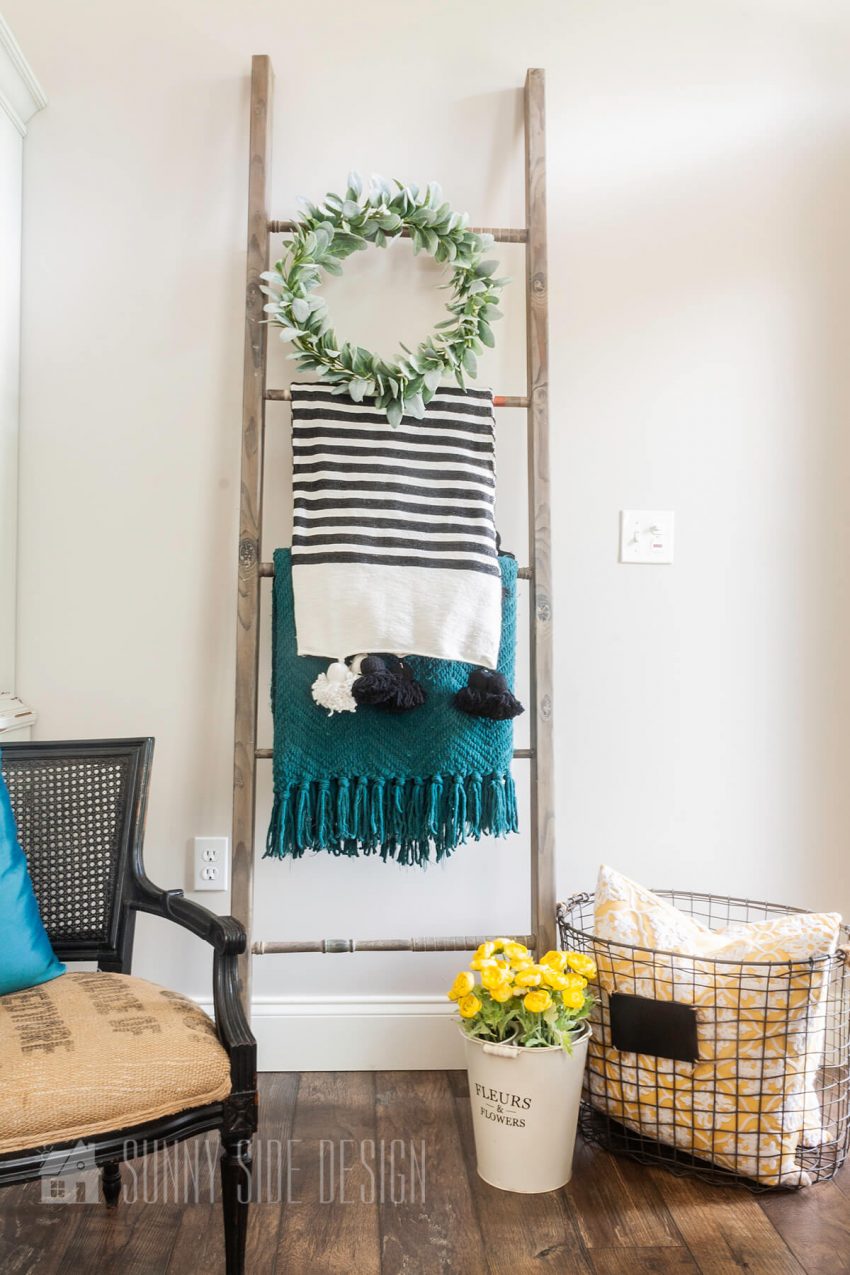
DIY Blanket Ladders That Are Perfect for Small Apartments
Are you struggling with limited storage space in your small apartment? Blankets, throws, and extra pillows can quickly take over precious real estate, leaving your living room looking cluttered and chaotic. But fear not, fellow space-challenged dwellers! There's a stylish and practical solution waiting for you: a DIY blanket ladder.
A blanket ladder is a simple yet elegant way to display and store your cozy throws. This versatile piece of furniture can be customized to match your decor and can be crafted from readily available materials. Whether you're a seasoned DIYer or a complete beginner, building a blanket ladder is a fun and rewarding project that will instantly elevate your home's aesthetic.
Why Choose a Blanket Ladder?
Beyond its aesthetic appeal, a blanket ladder offers several advantages:
- Maximizes vertical space: Utilize unused wall space to create a visually interesting storage solution.
- Easy access: No more digging through drawers or bins. Blankets are easily accessible and within arm's reach.
- Adds a touch of charm: A blanket ladder can add a rustic, farmhouse, or bohemian vibe to your living space.
- Affordable DIY project: Create a unique piece of furniture at a fraction of the cost of buying a pre-made one.
Materials You'll Need:
Before you embark on your blanket ladder building journey, gather the following materials:
- Wood: Choose sturdy wood like pine, cedar, or oak. Two 1x4s (for the sides), one 1x2 (for the rungs), and one 1x6 (for the base) should suffice. Adjust the lengths as needed based on your desired ladder height.
- Wood screws: Use screws that are long enough to secure the wood pieces together. Choose wood screws that match the color of your wood.
- Sandpaper: Smooth out any rough edges on the wood for a finished look and to prevent splinters.
- Wood stain or paint: Customize your blanket ladder with your preferred color or finish. You can use a clear sealant for a natural wood look.
- Measuring tape, pencil, and level: These tools will help you accurately measure and assemble the ladder.
- Drill and screwdriver: You'll need these to pre-drill pilot holes for the screws and tighten them securely.
Step-by-Step Instructions:
Ready to get your hands dirty? Follow these simple steps to build your own blanket ladder:
Step 1: Cut the Wood
Start by cutting the wood to your desired length using a saw. Remember to factor in the size of the base and the spacing between the rungs.
Step 2: Assemble the Sides
Using wood screws, secure the two 1x4 pieces together to form the sides of the ladder. Make sure the sides are parallel and the screws are countersunk to avoid protruding edges.
Step 3: Attach the Rungs
Measure and mark the desired spacing for the rungs. Use wood screws to attach the 1x2 rungs to the sides. Ensure the rungs are level and evenly spaced.
Step 4: Create the Base
Cut the 1x6 base to the desired width and attach it to the bottom of the ladder. This will provide stability and prevent the ladder from tipping over.
Step 5: Sand and Finish
Sand the entire ladder to smooth out any rough edges and give it a polished finish. Once the sanding is complete, apply your chosen stain or paint.
Step 6: Let It Dry
Allow the stain or paint to dry completely according to the manufacturer's instructions. Once dry, your blanket ladder is ready to be displayed!
Creative Touches for Your Blanket Ladder
Personalize your blanket ladder and make it truly unique:
- Add decorative hardware: Enhance the ladder's appearance with decorative hooks, knobs, or even small baskets for extra storage.
- Use different wood types: Combine different wood species for a contrasting and visually appealing look. Use reclaimed wood for a rustic touch.
- Paint with patterns or stencils: Unleash your inner artist and paint patterns, stripes, or stencils onto the ladder for a unique and personalized touch.
- Embrace your style: Match the ladder's design and finish to the overall decor of your living space. A farmhouse-style ladder can be painted white, while a modern ladder can have a sleek black finish.
Enjoy Your New Blanket Ladder
Your DIY blanket ladder is now ready to be showcased in your living space. Let your creativity run wild, and customize it to your liking. With a little effort, you can transform your small apartment into a cozy and stylish haven. Now, go ahead and enjoy the satisfaction of crafting your very own storage solution!
Monday, November 18, 2024
How to Craft Multi-Purpose Wall Shelves for Home Organization

Crafting Multi-Purpose Wall Shelves for Home Organization
In the realm of home organization, wall shelves emerge as a versatile solution, offering a plethora of benefits for both functionality and aesthetics. These ingenious structures effortlessly transform empty wall spaces into captivating displays and efficient storage solutions, freeing up valuable floor area and infusing your home with a sense of order and style. Whether you're seeking to showcase cherished mementos, curate an impressive book collection, or simply declutter your living space, crafting multi-purpose wall shelves provides a rewarding and personalized approach to home organization. Let's embark on a journey of creativity, where we'll delve into the art of crafting multi-purpose wall shelves that seamlessly blend form and function, transforming your home into a sanctuary of organization and style.
Essential Tools and Materials
Before diving into the construction process, it's crucial to assemble the necessary tools and materials. This will ensure a smooth and efficient building experience. Here's a comprehensive list of essentials:
- Wood planks: Choose wood types that align with your desired aesthetic and functionality. Pine, oak, and maple are popular options, offering a balance of durability and affordability.
- Screws: Opt for screws that are compatible with your wood type and shelf thickness.
- Measuring tape: Accurately measure the dimensions of your shelves and wall space to ensure a perfect fit.
- Level: Ensure your shelves are perfectly horizontal for a professional and balanced appearance.
- Drill: This tool will facilitate the installation process, ensuring a secure and stable placement of your shelves.
- Saw: Use a saw to cut your wood planks to the desired dimensions. A circular saw or a handsaw are practical options.
- Sandpaper: Smooth out any rough edges and imperfections on your wood planks for a polished finish.
- Wood glue: This adhesive will enhance the strength and durability of your shelf joints.
- Stain or paint: Personalize your shelves with a choice of stains or paints to complement your existing décor.
- Protective sealant: Apply a sealant to protect your shelves from moisture and wear, preserving their beauty and longevity.
Choosing the Right Shelf Design
The design of your wall shelves is a crucial aspect that dictates their functionality and aesthetic appeal. Consider the following factors when making your design decisions:
Shelf Depth
The depth of your shelves directly impacts their storage capacity. Shallow shelves are ideal for displaying small items, while deeper shelves can accommodate larger objects. Experiment with different depths to find the right balance for your specific needs.
Shelf Width
The width of your shelves plays a significant role in how much space they occupy on your walls. Choose widths that are proportional to the size of your walls and the items you intend to display.
Number of Shelves
Determine the number of shelves you require based on the quantity of items you plan to store. Multiple shelves offer greater storage capacity, while a single shelf creates a minimalist and impactful display.
Shelf Placement
Consider the height and placement of your shelves in relation to the surrounding furniture and décor. Strategic placement can enhance the visual appeal of your space and optimize storage efficiency.
Materials and Finish
The choice of materials and finish for your shelves can significantly influence the overall aesthetic of your space. Use materials that complement your existing décor and reflect your personal style.
Building and Installing the Shelves
Now that you have your design and materials ready, it's time to bring your vision to life. Follow these step-by-step instructions to build and install your multi-purpose wall shelves:
Measure and Cut the Wood
Using your measuring tape, precisely measure the dimensions of your shelves and mark the wood planks accordingly. Employ a saw to cut the planks to the desired lengths. Ensure that your cuts are clean and precise for a professional appearance.
Assemble the Shelves
If your design calls for multiple shelves, carefully join the individual planks using wood glue and screws. Apply glue to the joining surfaces and secure them together with screws. Allow the glue to dry completely before proceeding.
Sand and Finish
Sand the surfaces of your shelves thoroughly to smooth out any rough edges and imperfections. Apply a stain or paint to achieve your desired finish. Choose colors and finishes that complement your existing décor and personal taste.
Locate the Wall Studs
Using a stud finder, locate the wall studs behind the area where you plan to install your shelves. Wall studs provide structural support, ensuring that your shelves are securely mounted.
Mark and Drill Pilot Holes
Using a pencil, mark the wall at the desired locations for your shelf brackets. Drill pilot holes at the marked locations to prevent splitting the wood during installation.
Install the Brackets
Align the brackets with the pilot holes you drilled and secure them to the wall using screws. Ensure that the brackets are firmly attached to the wall studs for stability and safety.
Mount the Shelves
Carefully place the shelves onto the installed brackets. Ensure that the shelves are level and secure. You can use a level to ensure horizontal alignment. If necessary, adjust the shelf placement until you achieve the desired outcome.
Decorating and Organizing Your Shelves
With your multi-purpose wall shelves installed, it's time to decorate and organize your space. Here are some creative ideas to maximize their functionality and style:
- Display treasured keepsakes: Showcase family photos, souvenirs from travels, or meaningful artwork on your shelves.
- Organize books and magazines: Create a dedicated reading nook with shelves designed to store your favorite literature.
- Store essential items: Keep frequently used items, such as toiletries, spices, or office supplies, within easy reach on your shelves.
- Create a gallery wall: Arrange your shelves in a visually appealing pattern to display artwork, photographs, or decorative objects.
- Embrace vertical gardening: Transform your shelves into mini-gardens by placing potted plants or herbs.
By following these steps, you can craft multi-purpose wall shelves that are both functional and aesthetically pleasing, adding a touch of organization and style to your home. Embrace your creativity, and let your shelves become a reflection of your unique personality and style.